
4 wire ceiling fan wiring diagram – Hey there! Glam Girl here, ready to dive into the world of 4 wire ceiling fan wiring diagrams.
I know – it sounds like a mouthful, but stick with me!
We’re about to make this whole process a breeze.
Whether you’re a DIY enthusiast or just curious about how your ceiling fan works, you’re in the right place.
Let’s break it down, shall we?
First things first: what exactly is a 4 wire ceiling fan?
It’s pretty much what it sounds like—a ceiling fan with electrical connections made with four wires.
These fans are familiar and offer more control options than their 3-wire cousins.
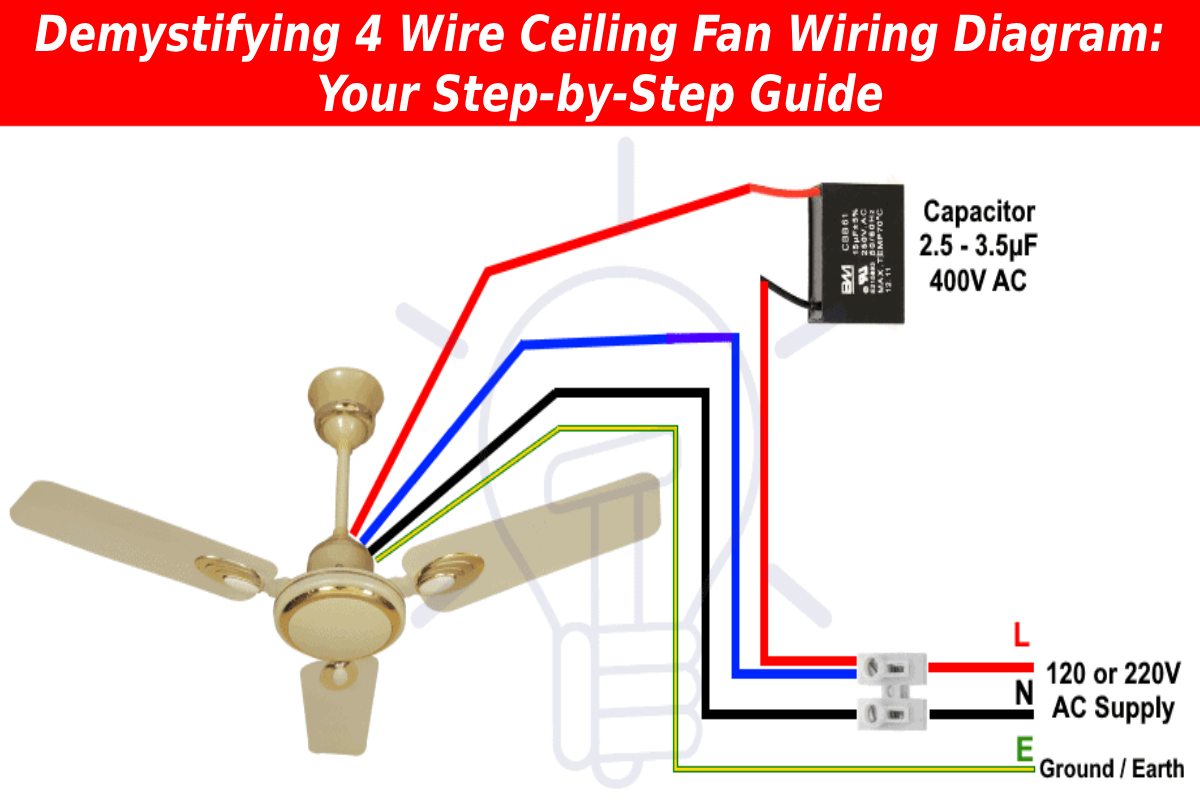
Now, let’s talk about those four wires:
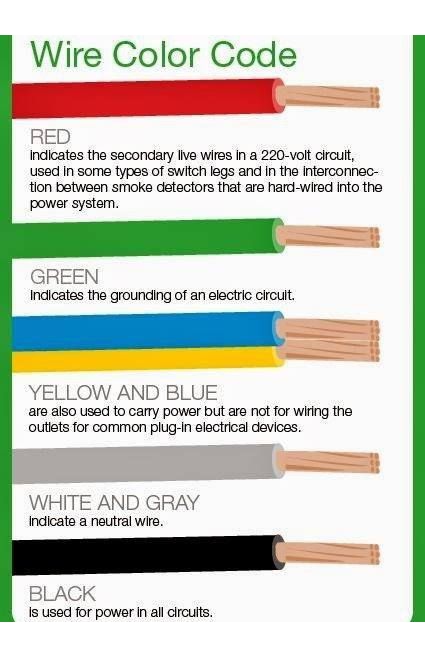
- Black wire: This is your hot wire for the fan motor.
- Blue wire: Another hot wire, but this one’s for the light kit.
- White wire: Your neutral wire.
- Green wire: The all-important ground wire.
Easy peasy, right? But wait, there’s more!
You must comprehend the wiring diagram to ensure a secure and effective installation.
So, let’s break down the critical components of a 4 wire ceiling fan wiring diagram:
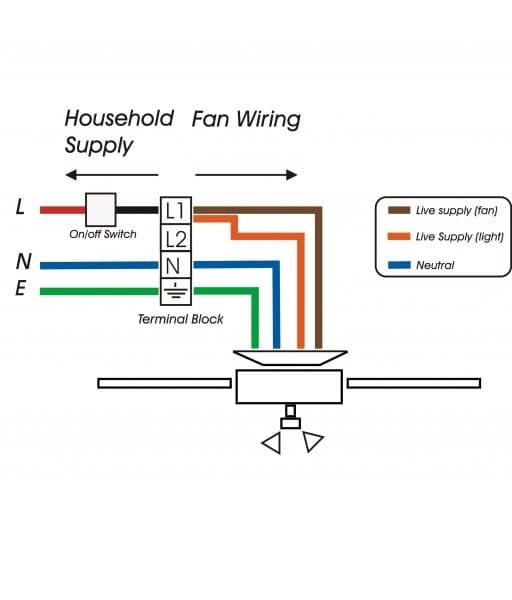
- Power source: Usually, your home’s electrical box.
- Wall switch: Controls the fan and light separately.
- Ceiling fan: The star of the show!
- Capacitor: Helps the fan motor start and run smoothly.
- Light kit: Because who doesn’t want some extra illumination?
Now, here’s where it gets interesting.
The way these components connect can vary based on your setup.
But don’t worry, I’ve got your back!
Let’s walk through a typical wiring process:
- Turn off the power at the circuit breaker. Safety first, folks!
- Attach the power source’s black (hot) wire to the fan’s black wire.
- The light switch’s wire is connected to the fan’s blue wire.
- Join all white (neutral) wires together.
- Connect all green (ground) wires to the metal electrical box.
Sounds simple enough, right? But here’s the kicker:
Every home is different, and you might encounter some variations.
That’s why always consulting your fan’s specific wiring diagram is crucial.
Now, let’s address some FAQs:
Q: Can I install a 4 wire ceiling fan myself?
A: If you’re comfortable with electrical work, sure! But when in doubt, call a pro.
Q: What if my ceiling box only has three wires?
A: You can still install a 4 wire fan, but you might need to connect the fan and light to the same switch.
Q: Do I need a special switch for a four-wire fan?
A: A dual switch is ideal for separate fan and light control.
Q: What’s the deal with the capacitor?
A: It helps the fan start and regulates speed. Please don’t mess with it unless you know what you’re doing!
Pro tip: Always, and I mean always, double-check your connections before turning the power back on.
Better safe than sorry, right?
Now, let’s talk troubleshooting:
- The fan won’t turn on? Check your circuit breaker and wall switch.
- Lights work, but the fan doesn’t? Your blue and black wires might be swapped.
- Everything’s wired up, but nothing works? Time to call an electrician, my friend.
Remember, electrical work can be tricky.
If you’re not 100% confident, there’s no shame in calling in a pro.
Your safety (and your home’s safety) is worth it!
So, there you have it – a crash course in 4 wire ceiling fan wiring diagrams.
We’ve covered the basics, walked through the process, and tackled some common issues.
But here’s the most important thing to remember:
- Every fan is unique, and so is every home.
- Always refer to your specific fan’s manual and wiring diagram.
- And when in doubt, don’t hesitate to seek professional help.
- After all, a properly installed ceiling fan is not just about comfort – it’s about safety, too.
Stay calm, stay safe, and happy wiring!